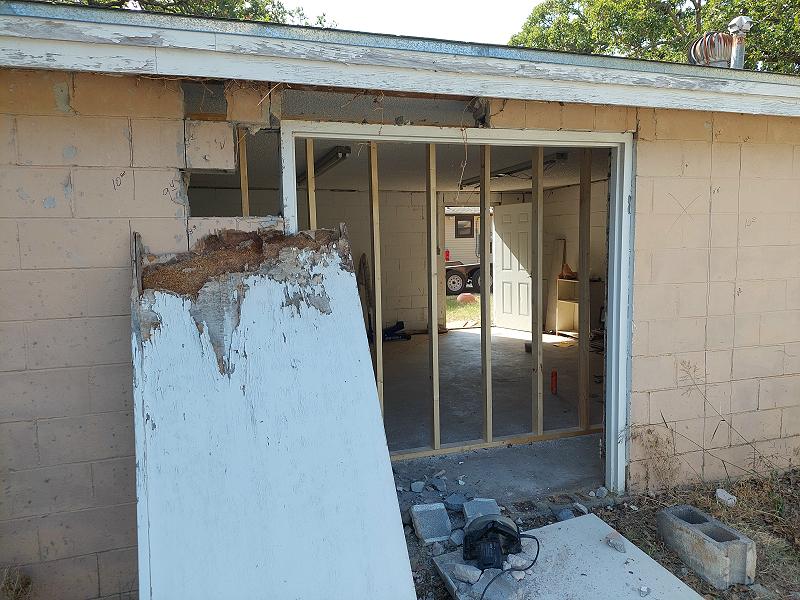
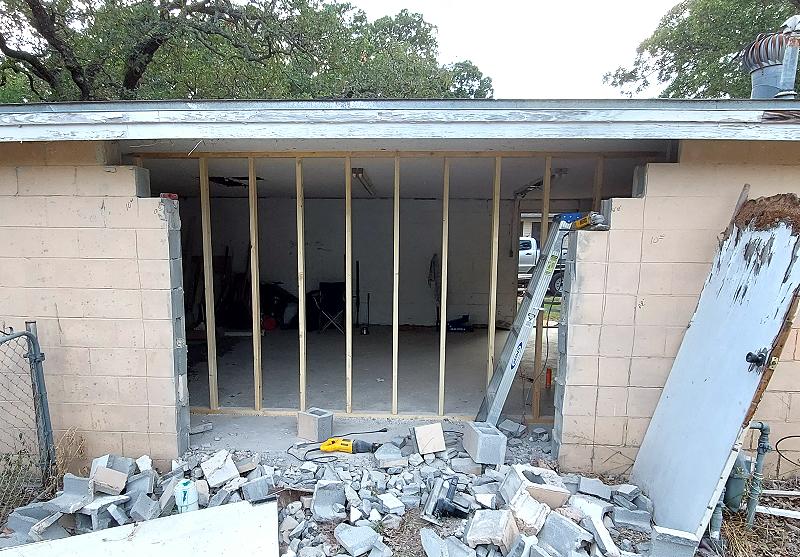
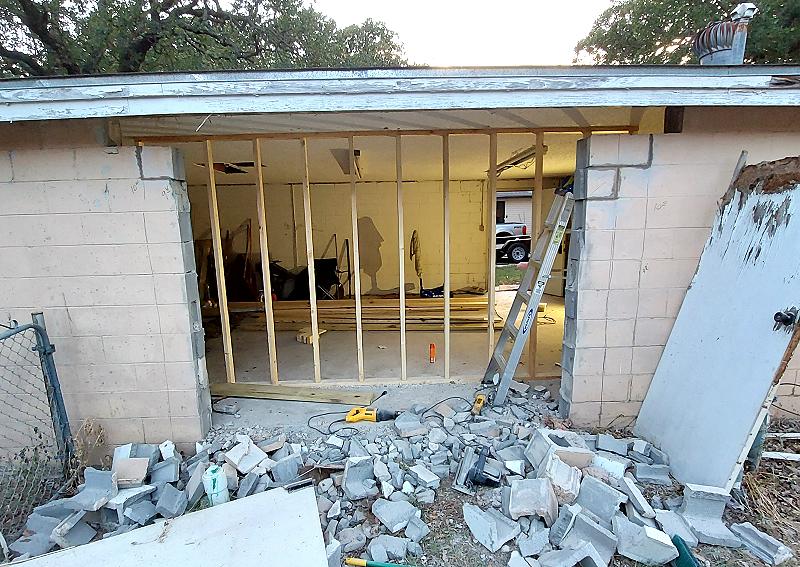
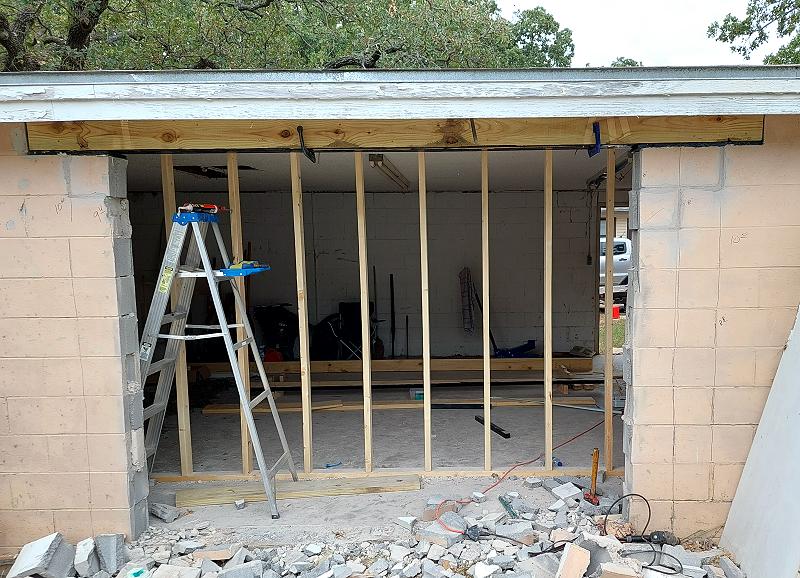
With the area cleaned up and a support wall in place to brace up the ceiling, I set out removing concrete block from the wall. After removing some of the block I stood back, took a good look, and asked myself ‘What in the hell am I doing? Why do I think I can do this?’
Cutting a big hole into the side of my building seemed crazy. I had never done this before. Although, this wasn’t some project that I randomly started. I had actually talked to people and gotten advice on this project a year prior. It was now October 2022, a year and nine months since taking possession of the property. Life had gotten in the way, but it was finally time to open this wall and start converting the building into what I needed it to be.
Using a concrete blade on my circular saw, I cut through the cinderblock wall following the lines I had measured out. The saw wasn’t big enough to go through the whole wall, so I had to cut from both sides.
WARNING: When working with concrete, a respirator is your primary defense against respirable crystalline silica, a fine dust created during cutting, grinding, and drilling. These microscopic particles are often invisible but can travel deep into the lungs, where they cause permanent scarring and inflammation. Because there is no cure for the resulting conditions—which include silicosis, lung cancer, and chronic obstructive pulmonary disease (COPD)—preventing inhalation is critical to avoiding long-term, life-threatening damage.
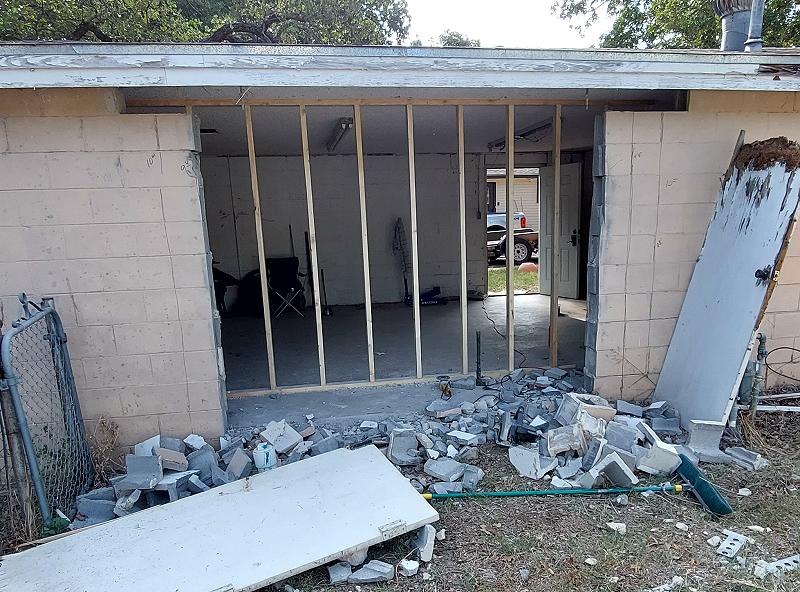
With the blocks removed, there were three blocks that were loose and had to be reset with mortar. With that done, I began building the header to go over the door. I glued and screwed two 2x8x12’s together and then attached a 1×8 on the bottom where it would sit on the blocks. The 1×8 and outer edges of the 2×8’s were painted with black oil base paint to protect them from moisture. I applied construction adhesive to the top of the cinder blocks and then set the header into place. With the header in place, I glued and screwed three more 2x8x12’s to the header. The final 2×8 that faces the exterior is pressure treated. Each 2×8 was clamped to the header to make sure it was bonded tightly as I screwed them together.
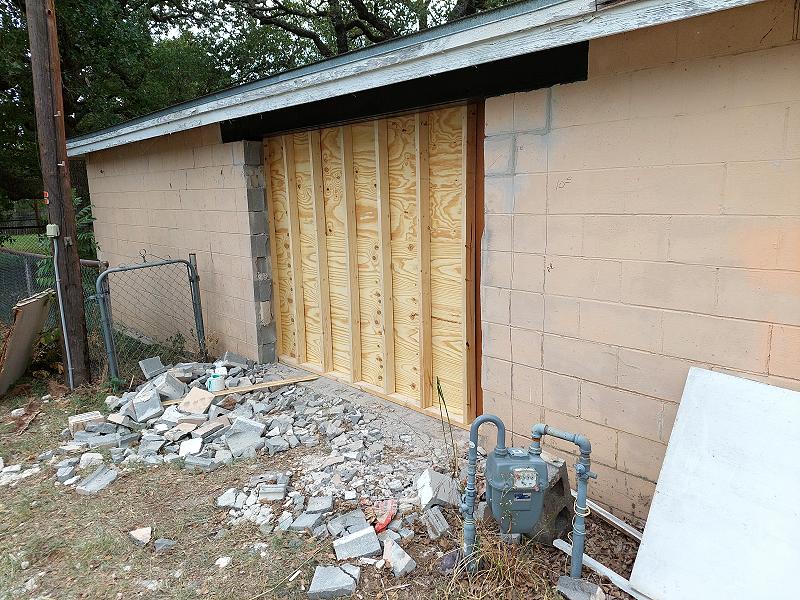
I ended up with an 8’9″ rough opening. I still need to clean up the edges of the block and trim it with wood. If I mount a 2×8 on each side, it should leave me with an 8’6″ opening.
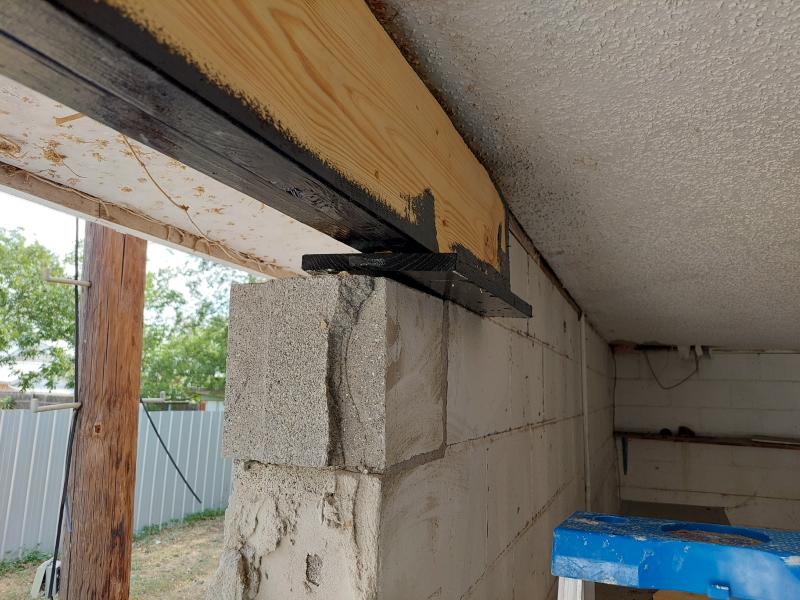
The header set on the block. It still needs to be moved into position and the remaining 2×8’s attached to it.
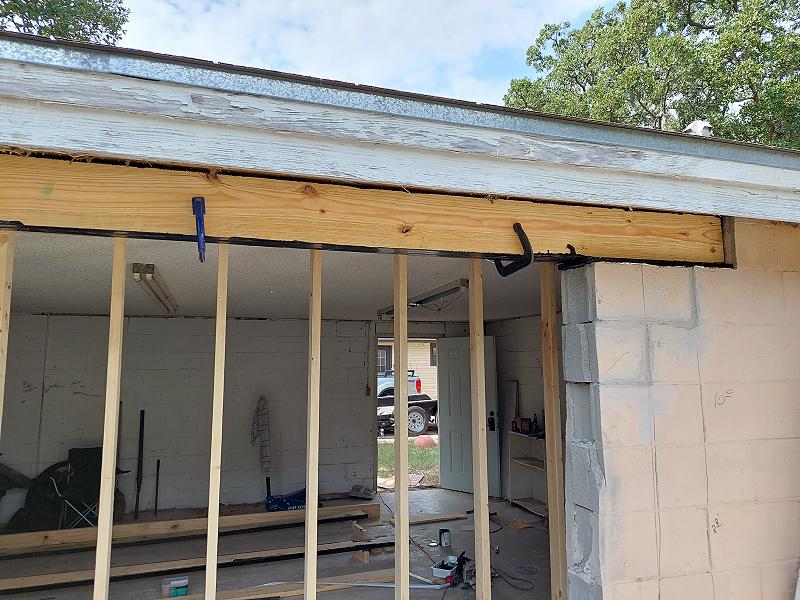
A 2×8 that’s been glued and clamped to the header about to be screwed into place
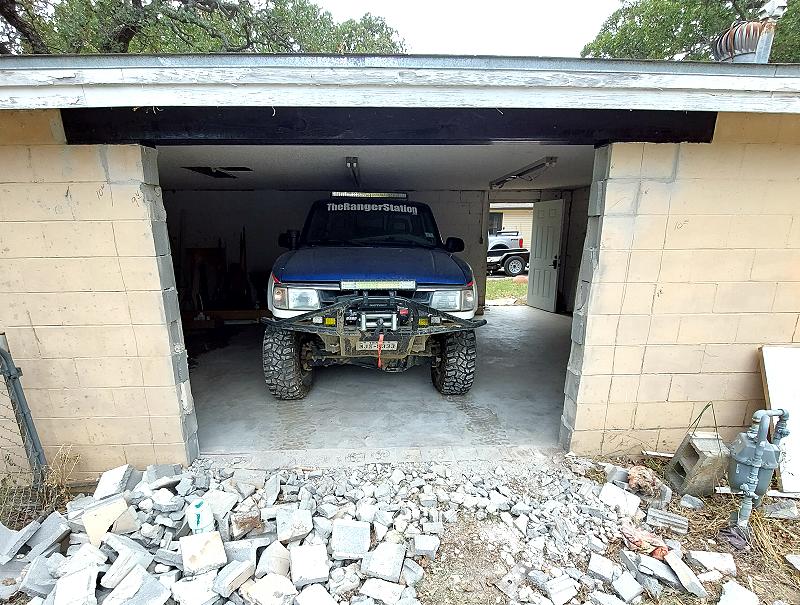
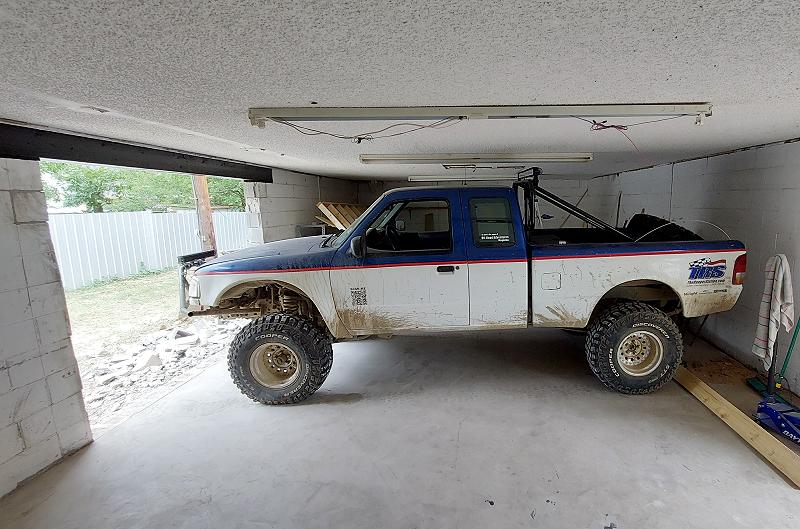
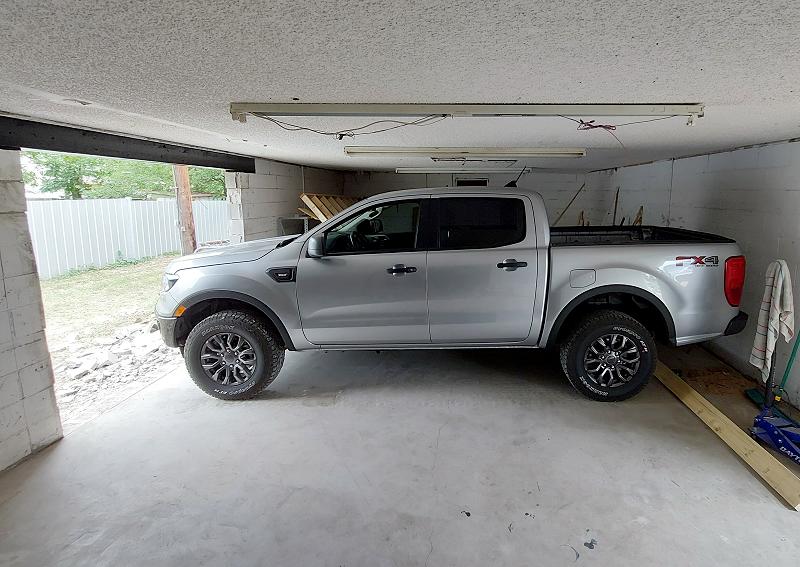
With the header in place, I could now remove the support wall and see how my Ford Ranger fits inside. My 1996 Ford Ranger 4×4 has a 6-inch lift, 33-inch tires and a LED lightbar mounted on the bed cage. As you can see from the photos below, it fits through the doorway and clears the ceiling. My 2021 Ford Ranger FX4 fits as well.
I’m calling this a success! I finally have a place that I will be able to pull a vehicle into and work on it. I narrowed up the support wall, repositioned it against the opening, and closed it up with plywood until I can build a door.

Tools Used
- Electric circular saw
- 7″ concrete diamond blade
- Electric drill
- Small sledgehammer
- Large C-clamps
- Caulking gun
Materials Used
- (4) 2x8x12’s
- (1) 2x8x12 pressure treated
- 1×8 Lumber
- 4×8 sheets of plywood
- #10×2-1/2 tan deck screws
- #9×2-1/2 construction screws
- Loctite PL-375 Heavy Duty Construction Adhesive
- Rust-Oleum oil-based paint
Everything I Needed I Got From