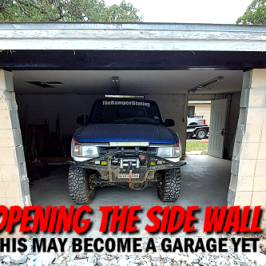
She Needs A Facelift
In the previous post I discussed exploring different ways to convert this building into a garage. I explored raising the roof and putting a garage door where this window and man door is. I also discovered that I could have someone build a new metal garage for half the cost of raising this roof and installing a garage door on this building. Knowing that the roof isn’t getting raised and I’m not going to be able to put a garage door here, I need to replace the front door and window and try to get the building looking decent.
Replacing The Door
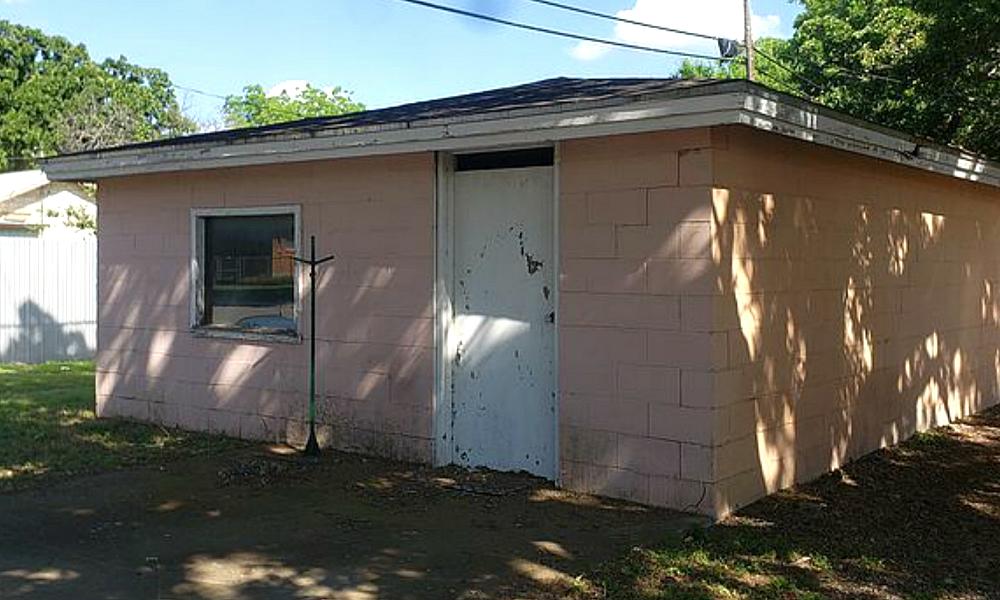
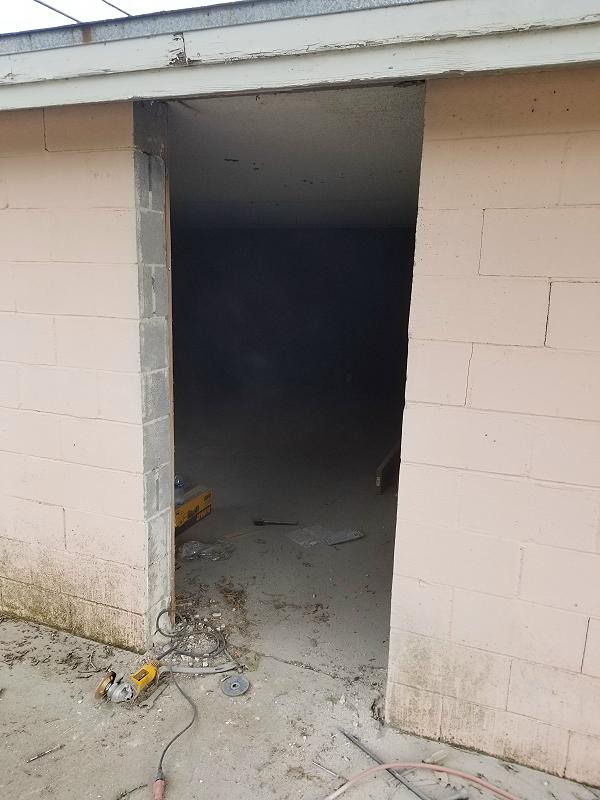
The front door was a solid wood door mounted in a commercial style metal door frame. The door frame had gaps around it that light could pass through, it opened in the opposite direction of how I want it to open, there’s a 2-inch gap between the top of the door and the frame, and part of the bottom of the door is rotted. The door is a very old door and is a true 36-inches wide whereas today a 36-inch door is actually 35-3/4 inches. Just replacing the door isn’t an option. I will have to replace the entire door and frame. For the record, I also object to whoever painted this building this pinkish color.
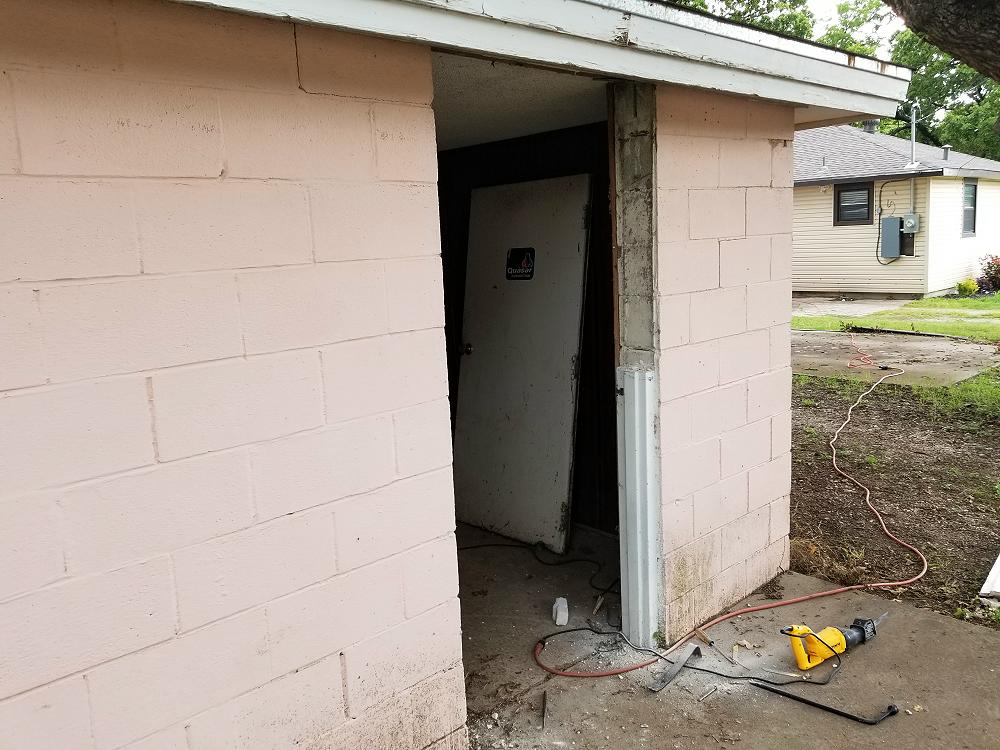
I underestimated this door frame. It was anchored into the concrete better than I thought. There were a couple of flat pieces of metal that had been laid between the rows of block that held the door frame in place. I ended up using my Sawzall and cutting the frame out in sections.
Measuring The Rough In
Nothing is ever easy, but overcoming difficult problems makes it that much more rewarding.
The opening in the cinderblock wall is 40.25″ x 87.25″. With a little clean up with my grinder and diamond wheel it could be 40.50″ wide. If I add a 2×8 wood rough in (buck) it would give me a rough opening width of 37.50″ (after grinding).
Typical rough in openings I found are:
- 32″ x 80″ door (actual width 33.50″) = 34″ x 81.75″ rough in opening
- 34″ x 80″ door (actual width 35.50″) = 36.25″ x 82.125″ rough in opening
- 36″ x 80″ door (actual width 37.50″) = 38″ x 82.25″ rough in opening
A 36″ door needs a 38″ rough in which means I’d have to grind down the block another 1/2″ just to try and squeeze it in there. That’s a lot of work.
Adding another 2×8 to one side would reduce the rough in opening to 36″ and would be a 1/4″ to narrow for a 34″ door.
Adding an extra 2×8’s to both sides reduces the opening down to 34.25″ which is 1/4″ to big but allows plenty of room to shim.
Roughing In & Hanging The Door
WARNING: Make sure you use a respirator when grinding concrete. When working with concrete, a respirator is your primary defense against respirable crystalline silica, a fine dust created during cutting, grinding, and drilling. These microscopic particles are often invisible but can travel deep into the lungs, where they cause permanent scarring and inflammation. Because there is no cure for the resulting conditions—which include silicosis, lung cancer, and chronic obstructive pulmonary disease (COPD)—preventing inhalation is critical to avoiding long-term, life-threatening damage.
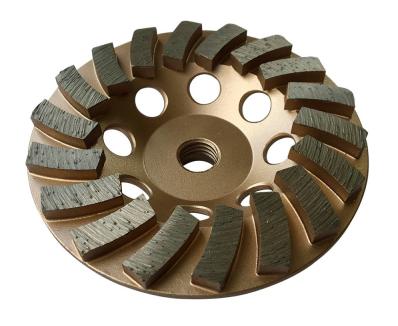
Diamond Grinding Wheel For Concrete
With the frame removed, I took a diamond grinding wheel for concrete and smoothed the inside edges so the new door frame would have a smooth surface to attach to. I then built a rough in frame opening (buck) out of 2×8 pressure treated lumber. You have to use pressure treated lumber against concrete to protect it from moisture and rotting. I used two 2×8’s laid across the top for a header and then cut short 2×8 ‘cripple’ studs to fit between the header and the top plate that runs along the top of the block wall. There isn’t any cinderblock above the door.
I applied Loctite PL-375 Heavy Duty Construction Adhesive to the backside of the 2×8’s and then screwed them into the concrete with 1/4″ x 2-3/4″ flathead Tapcon concrete screws.
NOTE: DO NOT use the drill and T30 bit to drive the Tapcon screws in. Use a multi-bit screwdriver and screw them in by hand. Too much force will make the screw strip out the concrete and not tighten up.
With that installed, I added a second 2×8 to both sides of the rough in. The one on the latch side of the door isn’t pressure treated, and there’s a small gap at the bottom so it’s not on the concrete. I used wood shims to adjust it so that it was plumb and level. As you can see, it had gotten dark by the time I finished.
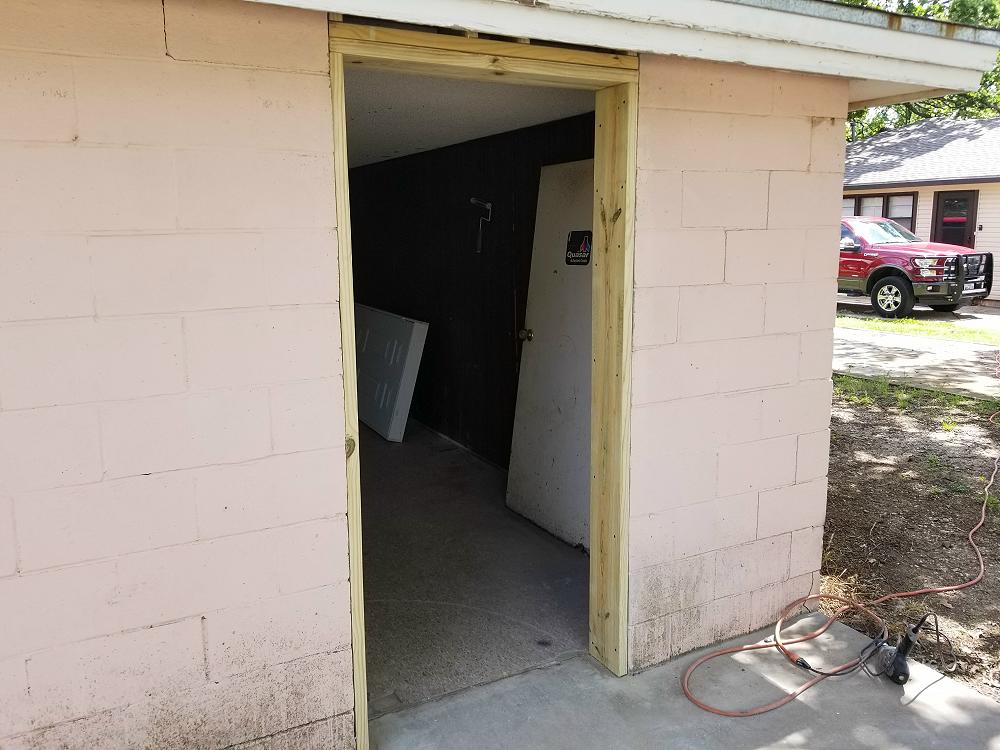
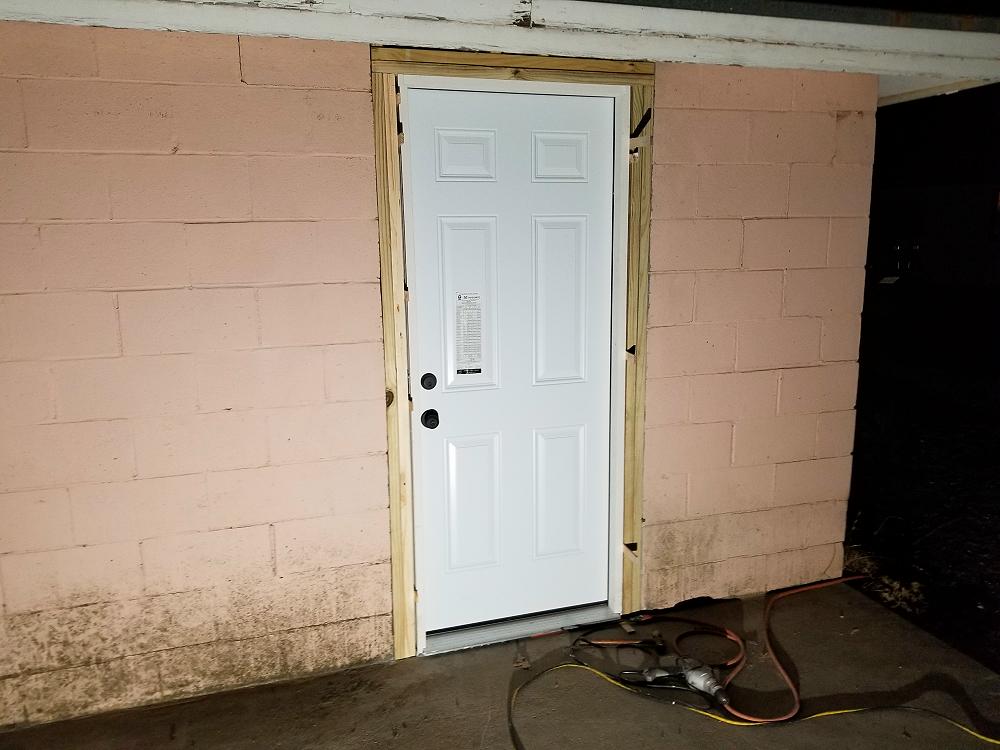
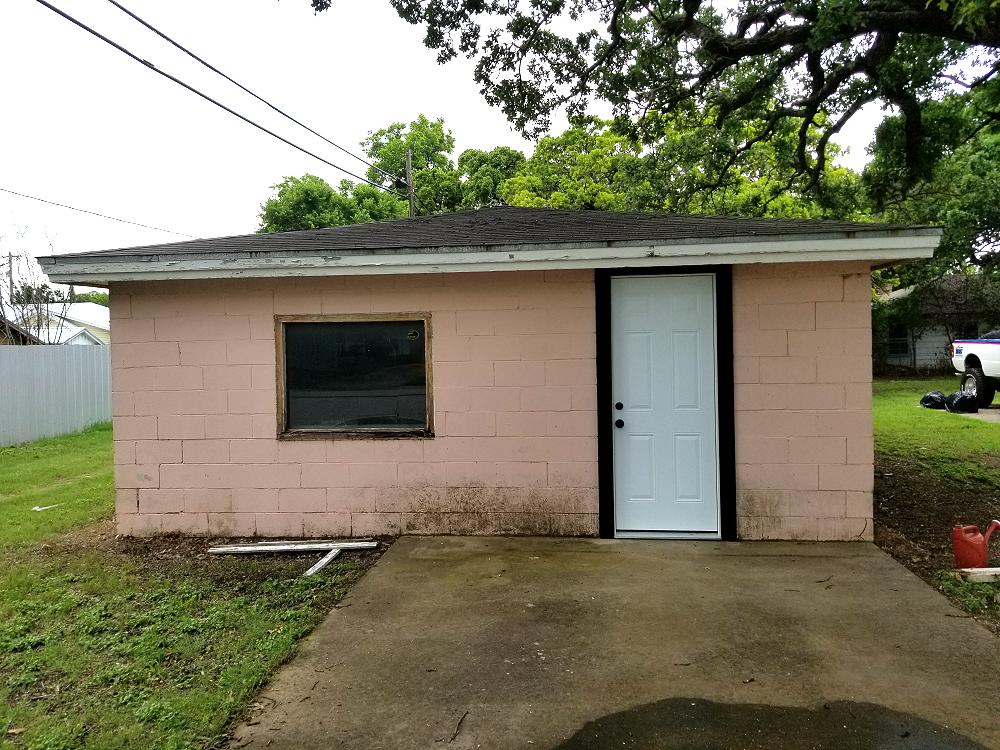
The next day I trimmed the door with 1×5 wood boards. I did not use pressure treated boards, but I painted both sides of the boards and then nailed them to the wood frame with 2″ x 6D Hot Dipped Galvanized Non-Collated Exterior Finishing/Casing Nails. It’s amazing how much better it looks just by replacing the door. The window is next!
Materials Used
- 32×80 steel exterior prehung door
- 2×8 pressure treated lumber
- A regular 2×8
- 1×5 wood board for trim
- 1/4″ x 2-3/4″ Tapcon flathead concrete screws
- Loctite PL-375 Heavy Duty Construction Adhesive
- 2″ x 6D Hot Dipped Galvanized Non-Collated Exterior Finishing/Casing Nails
Tools Used
- Sawzall
- Grinder with diamond wheel for concrete
- Electric drill with concrete drill bit that came with the Tapcon screws
- Multi-Bit screwdriver with T-30 bit for Tapcon screws (Comes with screws)
- Electric saw
- Safety glasses and disposable respirator
- Level
- Square
Everything I Needed I Got From